The glute bridge floor exercise is one of the cleanest ways to build hip extension when I want a movement that is simple, joint-friendly, and easy to slot into conditioning work. It teaches the glutes to do their job without a lot of setup, and it also gives the core a useful stability challenge. In practice, that makes it valuable for warm-ups, accessory work, and low-fatigue strength circuits.
What matters most if you want the bridge to pay off
- Set up so the ribs stay down and the hips lift without a low-back arch.
- Start with feet placed so the top position feels like glutes, not hamstrings or lumbar extension.
- Use it for activation, accessory volume, or controlled conditioning intervals.
- Progress by pausing, adding load, or moving to single-leg work only after the basic version is crisp.
- If the bridge feels wrong, the fix is usually in position, not in chasing more reps.
Why I still use the floor bridge in conditioning
I treat the bridge as a horizontal hip-extension drill: you lie down, drive the hips up, and teach the glutes to produce force without turning the lower back into the prime mover. That matters in functional fitness because the same basic pattern shows up in deadlift setups, sprint start mechanics, posture control, and a lot of combat-sports movement where you need to bridge, reset, or explode from the hips.
It is also a practical exercise for people who spend too much time seated. The glutes tend to go quiet, the hip flexors get sticky, and the body starts borrowing from the low back. A bridge gives me a low-cost way to reverse that pattern before heavier lifting or hard conditioning. The catch is simple: it only works that way if the pelvis and rib cage stay organized, and that brings us to the setup.
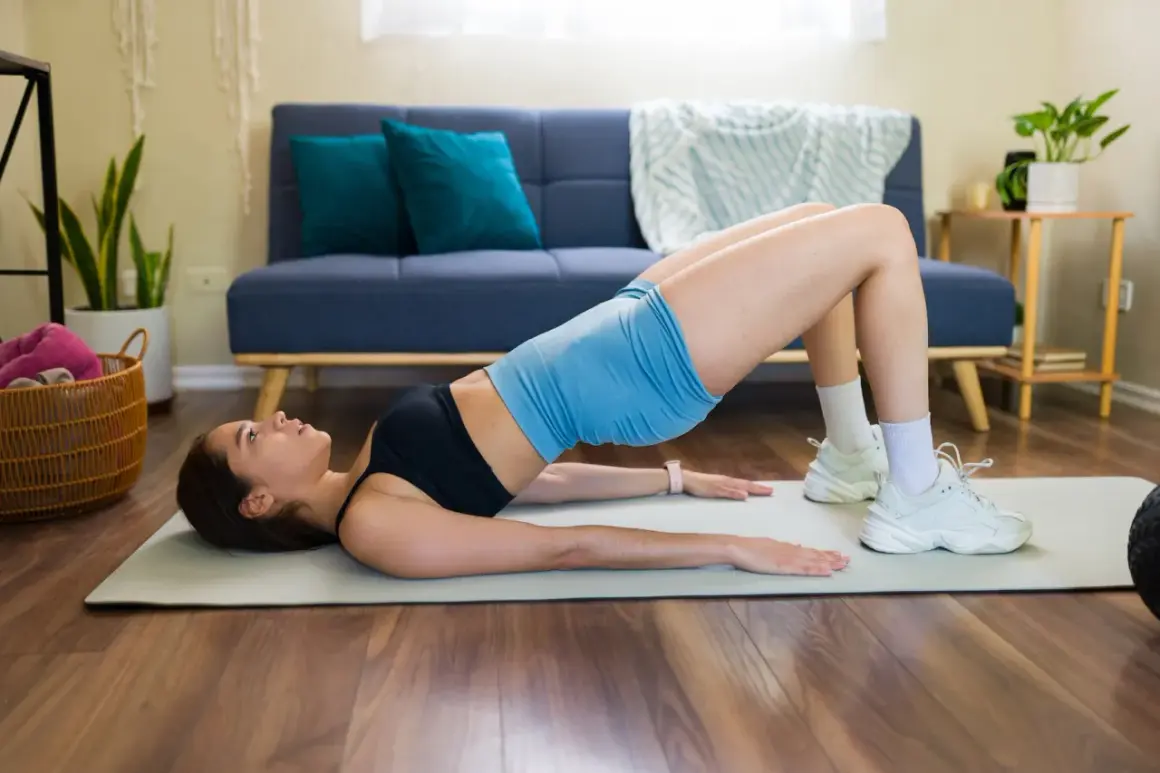
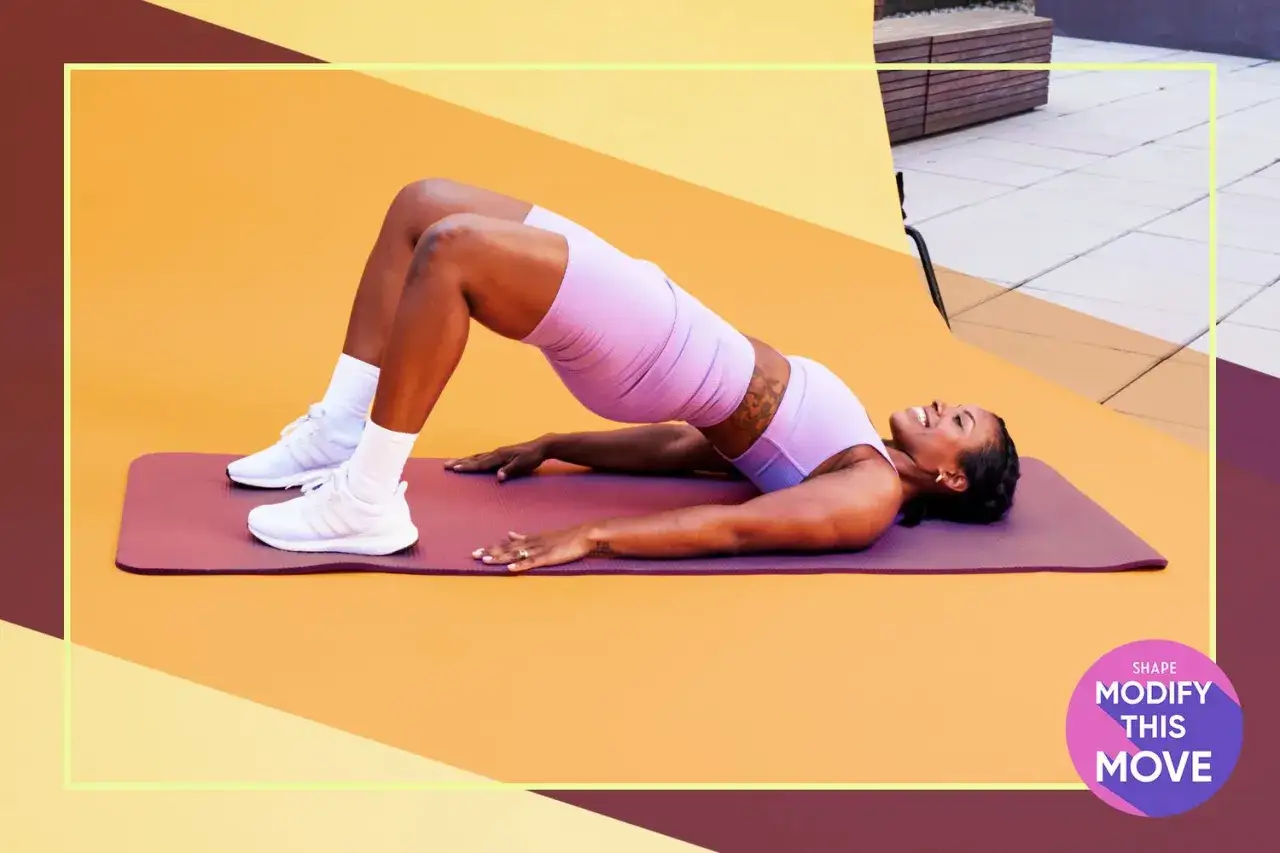
How to do it with the right hip and rib position
I coach the movement with one rule first: keep the torso quiet while the hips do the work. A small amount of extension at the top is normal, but the bridge should not turn into a low-back crunch in reverse. If you have to arch hard to get higher, the range is already too big.
- Lie on your back with knees bent and feet flat. Start with feet about hip-width apart and roughly 6 to 8 inches from the glutes, then adjust until the top position feels stable.
- Set the ribs down and lightly tuck the pelvis. That tuck is a posterior pelvic tilt, which simply means bringing the front of the pelvis up so the low back stops flaring.
- Press through the heels and lift the hips until the body makes a clean line from shoulders to knees.
- Pause for 1 to 2 seconds at the top, squeeze the glutes, then lower under control without dumping tension.
I like to think of the top position as “tall hips, quiet ribs.” If the hamstrings cramp or the low back starts to take over, I do not automatically add reps; I adjust the stance, slow the tempo, and clean up the rep first. Once the pattern is right, the common mistakes become easier to spot.
Common mistakes that move the work away from the glutes
Most bad bridges do not fail because the exercise is too easy. They fail because the athlete uses the wrong muscles to finish the rep. That is useful to know, because the fix is usually technical, not just harder training.
| Error | What it usually looks like | What I change |
|---|---|---|
| Overarching the low back | The hips rise, but the ribs flare and the spine does most of the work. | Shorten the range, brace lightly, and finish with the glutes rather than the lumbar spine. |
| Driving through the toes | The heels lose pressure and the hamstrings or calves start to dominate. | Keep pressure through the heels and keep the whole foot grounded. |
| Rushing the reps | The bridge bounces up and down with no pause at the top. | Use a 1 to 2 second squeeze so the glutes actually own the lockout. |
| Going too high | The hips chase height even after the pelvis has stopped moving cleanly. | Stop at the point where the line from knees to shoulders is solid and controlled. |
| Letting the knees drift | The knees collapse in or flare out without control. | Keep the knees stacked and the feet planted so the pelvis stays centered. |
I see these errors most often when people are trying to turn a bridge into a burner. Burn is fine; sloppy is not. The next step is choosing the right progression, because not every athlete should jump straight to loading or single-leg work.
Ways to scale it without losing the pattern
My progression rule is straightforward: first earn clean reps, then add time under tension, then add complexity. That keeps the bridge useful for conditioning instead of turning it into a compensation drill. For most people, a harder version should still look like the same exercise, just with more demand on the glutes and trunk.
| Variation | Best use | Coaching note |
|---|---|---|
| Paused bridge | Activation or early strength work | Hold the top for 2 seconds to sharpen glute recruitment without adding much fatigue. |
| Tempo bridge | Conditioning circuits | Use a slow lower to keep tension high and avoid bouncing through reps. |
| Mini-band bridge | Glute medius emphasis | Press the knees gently outward so the hips stay level and the band does not become a distraction. |
| Weighted bridge | Strength-focused accessory work | Place the load across the hips and keep the set strict enough that the low back never takes over. |
| Single-leg bridge | Asymmetry and pelvic control | Use it only if the two-leg version is already clean; otherwise you just expose the same errors on one side. |
If you are using the bridge in a combat-sports or functional-fitness block, I usually prefer pauses and controlled tempo before I chase external load. They build the pattern, and they do it without stealing freshness from the rest of the session. That leads naturally into programming, because the same exercise can live in very different places in the workout.
How to program it in warm-ups and circuits
The bridge is versatile because it can be a primer, an accessory lift, or a light conditioning tool. I choose the dosage based on what the session needs most: movement quality, strength volume, or work capacity. If the rest of the workout is already heavy on hinges, I keep the bridge lighter. If the session is mostly mat work, sprint work, or upper-body training, I am more comfortable pushing the glute work a little harder.
| Goal | Practical prescription | Why it works |
|---|---|---|
| Warm-up activation | 1 to 2 sets of 8 to 12 reps with a 1 to 2 second squeeze | Wakes up the glutes without producing much fatigue before the main lift. |
| Accessory strength | 2 to 4 sets of 10 to 15 reps, resting about 45 to 75 seconds | Builds more total glute volume while the movement stays simple and strict. |
| Conditioning circuit | 20 to 30 seconds of work, 20 to 30 seconds of rest, for 3 to 5 rounds | Raises local muscular endurance without wrecking the nervous system. |
| Recovery day primer | 1 to 2 easy sets of 8 to 10 reps | Keeps the hip extension pattern active on days when heavy lifting is not the goal. |
For most athletes, I would rather see a few high-quality sets done consistently than a random marathon of sloppy reps. That is especially true when the bridge is meant to support bigger lifts, because the real question then becomes whether the floor version is enough or whether a hip thrust makes more sense.
Floor bridge or hip thrust and when I choose each
They look similar, but they are not interchangeable. The floor bridge stays shorter, simpler, and easier to recover from. The hip thrust gives you more range of motion and usually a better setup for heavier loading, so it tends to win when pure strength is the priority. In other words, the floor bridge is the cleaner teaching tool; the hip thrust is usually the heavier builder.
| Exercise | Range of motion | Loading potential | Best use | Main limitation |
|---|---|---|---|---|
| Floor bridge | Shorter | Moderate | Activation, technique, low-fatigue conditioning | Can cap out sooner for stronger athletes |
| Hip thrust | Greater | Higher | Heavier glute strength and hypertrophy work | Needs more setup and usually more recovery |
| Single-leg bridge | Short to moderate | Bodyweight or light load | Pelvic control, asymmetry checks, unilateral accessory work | Harder to keep perfectly clean |
When I compare them this way, the choice becomes obvious: use the floor bridge when you want a cleaner, lower-fatigue pattern; use the hip thrust when you want more range and more load. I also use the floor bridge as a bridge in the literal sense, because it can move athletes from basic activation work toward harder posterior-chain training without a big jump in complexity. That makes it easier to keep in the program long enough to matter.
Keep the bridge in the program for the right job
If I had to reduce this exercise to one coaching principle, it would be this: keep the bridge when you need cleaner hip extension, not just more fatigue. It is still one of the best low-barrier tools for glute activation, basic strength, and conditioning that does not beat up the joints.
The exercise starts to lose value when you use it as a substitute for everything else. If your goal is heavier glute loading, build toward a more demanding bridge variation or a hip thrust. If your goal is better movement quality, stay with the floor version and make every rep look disciplined. That is usually where the most useful progress happens.